Sunday, 5 February 2012

One Word, One Technique #6

Welcome to the second month of 'One Word, One Technique' :D


For a reminder of how 'One Word, One Technique' works, click here for Maxine's introduction.

A new month means a new technique! The prompt for week 6 is:

February Technique - Stamping
This Week's Word - Smile

I was so inspired by this week's prompt, I've actually got two examples to share with you! For my first example I continued with my plan to create a journal page for each prompt:
I created my background on a plain white page using nothing but stamps and archival ink in several colours. I started off with the large red hearts and built up the design from there, layering different stamps and colours. 
I used the same set of chipboard alphas as my first page to create the first part of my title, and then used a small set of alpha stamps to finish the quote. Finally I splashed some red ink on the page to give an extra bit of colour.

Then I started thinking about stamping on layouts, and how I don't really do it enough. So I grabbed a photo of Mojo which I thought would work well with the word 'smile' in the title, my favourite set of My Minds Eye stamps from the Lost & Found 2 collection and my little alpha stamps, and this is the result:
I splashed some black ink onto the white card, and then built up the border on the left hand side. The MME stamp set contains three different banner stamps, which I've stamped with black ink at various intervals along the edge. I then cut some banner pieces from Hambly washi tape and filled in the gaps.
I added three more strips of washi tape for the photo and title to sit on, some stamped hearts from the MME stamp set, and some Studio Calico butterflies. I used Studio Calico alpha stickers for the main title, and added the subtitle with the small alpha stamps. Mojo usually poses for the camera, and always looks like she's smiling, but for some reason on the day that I took this photo she was in a sulk and wouldn't pose for me - hence my title!

I hope you like my examples this week - as always, if you join in with the prompts make sure to link us up in the comments below so we can come and have a look :D

Jules xx

Thursday, 2 February 2012

February Kit - Yo Yo Tutorial

Hi Everyone! It's Alexa back with another layout using the February kit. I really wanted to use the fabric squares that come with the kit and so I decided to make a yo yo flower embellishment for my page. They are really easy to make, even if you're a non sewer! In addition to the kit you'll just need a needle & thread.

First you'll want to fold over one of the edges of the fabric about a 1/4" and using a running stitch, sew all the way along the edge.


Pull the thread tightly so that the fabric bunches up and repeat the above step along the next edge and the whole way along the fabric, so that the fabric forms a circle. 


To finish off sew a button on the middle and you've got your yo yo!


Here's my finished layout. 


Tuesday, 31 January 2012

February Kit

The new kit is now for sale and it's a pretty one!! It being valentines in a just a few weeks the kit is full of lots of pinks and reds, but it's still versatile enough to use on projects with other themes! Like this layout I did about a cupcake making class I took.


Extra Supplies: Cardstock

I went a little over the top with the love theme on this page about my sister and her boyfriend though. All those hearts were cut free hand with my trusty scissors!


Extra supplies: Paint, Mist, Cardstock

I also made a mini album about all the things I LOVE right now. This is something I like to do periodically as they are always fun to look back on and see how things have changed, or not as the case may be!


Extra Supplies: Chipboard numbers, ring to fasten album, cream paper.

This kit is packed with stuff! You can see the whole list of contents and purchase the kit here. I'll be back with another layout and a tutorial tomorrow. Happy Creating!


Alexa

OWOT extra project

As our technique this month was focusing on paint I thought I would share this little extra tutorial that I created some time ago for creating an interesting background using paint. This can be used for a whole load of different craft projects, layouts, cards, ATCs, art journals, mini books etc.

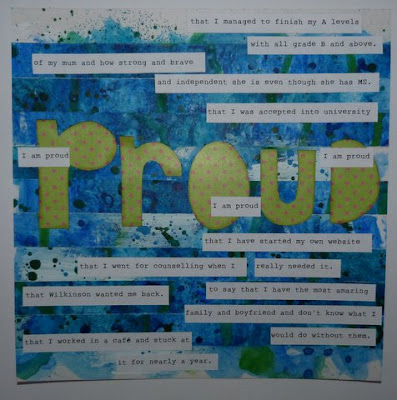
Word - Proud

Technique - Paint - Masking Tape Background

Here is my finished Layout.


Technique
This technique is all about creating a fun and unique background. You will need:
Masking Tape
A non porous surface
Paint/watercolours/mist sprays
Paint brushes
Card

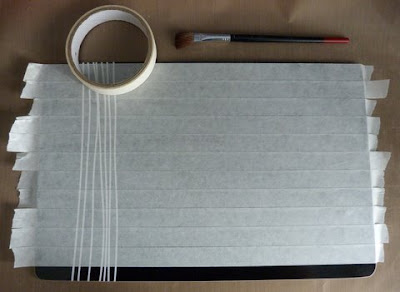
Start by sticking strips of masking tape to your non-porous surface, I just used an old placemat, but you could use your craft mat, chopping board etc.


Try and place the strips as close together as possible without overlapping. Cover the surface until you have enough that it would cover the size of your finished layout (my finished layout measures 8"x8" but I made the masking tape strips longer so that I could then decide which section I wanted to use).

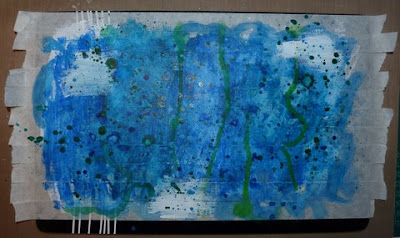
Now start painting away! I started by randomly applying some gesso (this is not essential) and letting it dry (ok well drying with my heat gun then!) then on top I started adding layers of different blue paints and mist sprays and dabbing the excess off with some tissue and letting some layers dry before applying the next.

I dribbled some green down the page and flicked my paint brush so I would get lots of dots and splodges!


The more layers and messier you make the page the more varied your finished background will be; a more even paint coverage will create a more uniform background.

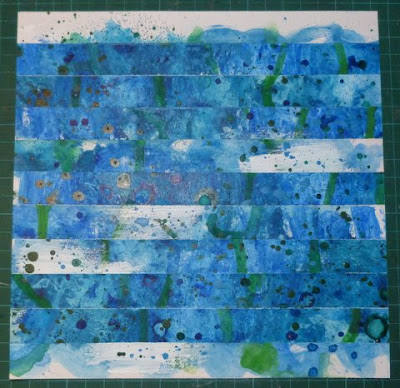
Once all the paint is dry take some card the size you want the finished piece to be. Starting at the top of your cardstock select a random piece of masking tape and stick down. Then select another random strip and stick under the first, continue covering the cardstock with the masking tape strips but arranging them in a different order than on your placemat. This will create a unique and pretty background and no 2 will ever be the same! Trim the tape from the edges and your background is complete.

Now take some letter stickers or cut a title out of patterned paper and stick in the middle of your background. Finally add words, sentences, bullet points etc of what your proud of. I printed mine using a Typewriter type font (Rough_Typewriter which is free and can be found here) onto plain white paper and cut into strips to add to my layout. I left mine at that but you can of course add extra embellishments if you want.

I hope you have enjoyed this little extra project and have had fun with all our painty layouts and journal pages this month. Watch out for our next technique on Sunday!

Maxine

Sunday, 29 January 2012

One Word One Technique # 5

Hi and welcome to week 5 of One Word One Technique.
January Technique - Paint
This weeks word prompt - Wish

Here is my finished journal pages ...
To make the background was really simple.
First take some white Gesso and brush all over your page,to speed up the drying process i used my handy heat tool..just don`t hold it too close or the paint will blister.
Once dry i took some Gold pearlescent Acrylic paint and splodged it straight on the page ...
and brushed all over till i was happy

I then took some white Gesso and dry brushed it ove the page and worked it in with a dry sponge.To add the splotches take some Distress ink and with a fine brush flick it over the pages until you are happy.I found that the ink didn`t sink into the page so with a paper towel just lightly dap over the top.
I wanted a more aged look to my pages so with a distress ink pad and with an ink tool i used brushed corduroy and black soot roughly around the edges.
 The heart was made from cardboard packaging,i took the backing off ,cut out a heart,dry brushed with some gesso and gold acrylic then stamped on the Wish sentiment.
Then had some fun adding stamps,journalling and embellishments.
This is the first time i have used paint on journalling pages and hope you like what i have done and hopefully inspire you to break out those paints and brushes yourself!
Please checkout the past posts for more inspiration from the lovely DT ladies.
If you play along we would all love to see what you make so please pop back and leave a comment,look forward to visiting you all.
Happy Crafting
Tracy
oxoxo
P.S The end result of my journal pages was taken outside so you get a better idea of how the colours look as the light inside my shed isn`t so good.

Sunday, 22 January 2012

One Word One Technique #4

Welcome to week 4 of OWOT. I hope you have enjoyed the previous weeks examples.


January Technique - Paint
This Week's Word - Go


I used a really simple paint technique, to create my title to add a bit of whimsy. I know that a lot of people don't really like their handwriting, but as it's part of who you are, I think it's important for it to be a part of your pages. I did my title freehand, but if you're not quite that confident, you can write out the title in pencil first and paint over it. I would recommend watering down the paint especially if you want a free flow effect. If you're really not keen on using your own handwriting but like the artsy feel of a painted title, you could always try using a stencil or stamping with foam alpha's.

I hope this inspires you to get painty with your titles. Remember if you create something using this technique, please leave a comment so we can come see!

Alexa

Sunday, 15 January 2012

OWOT prompt 3!

Another week has whizzed by and we're back with another prompt for our new challenge 'One, word, one technique'.
January Technique - Paint
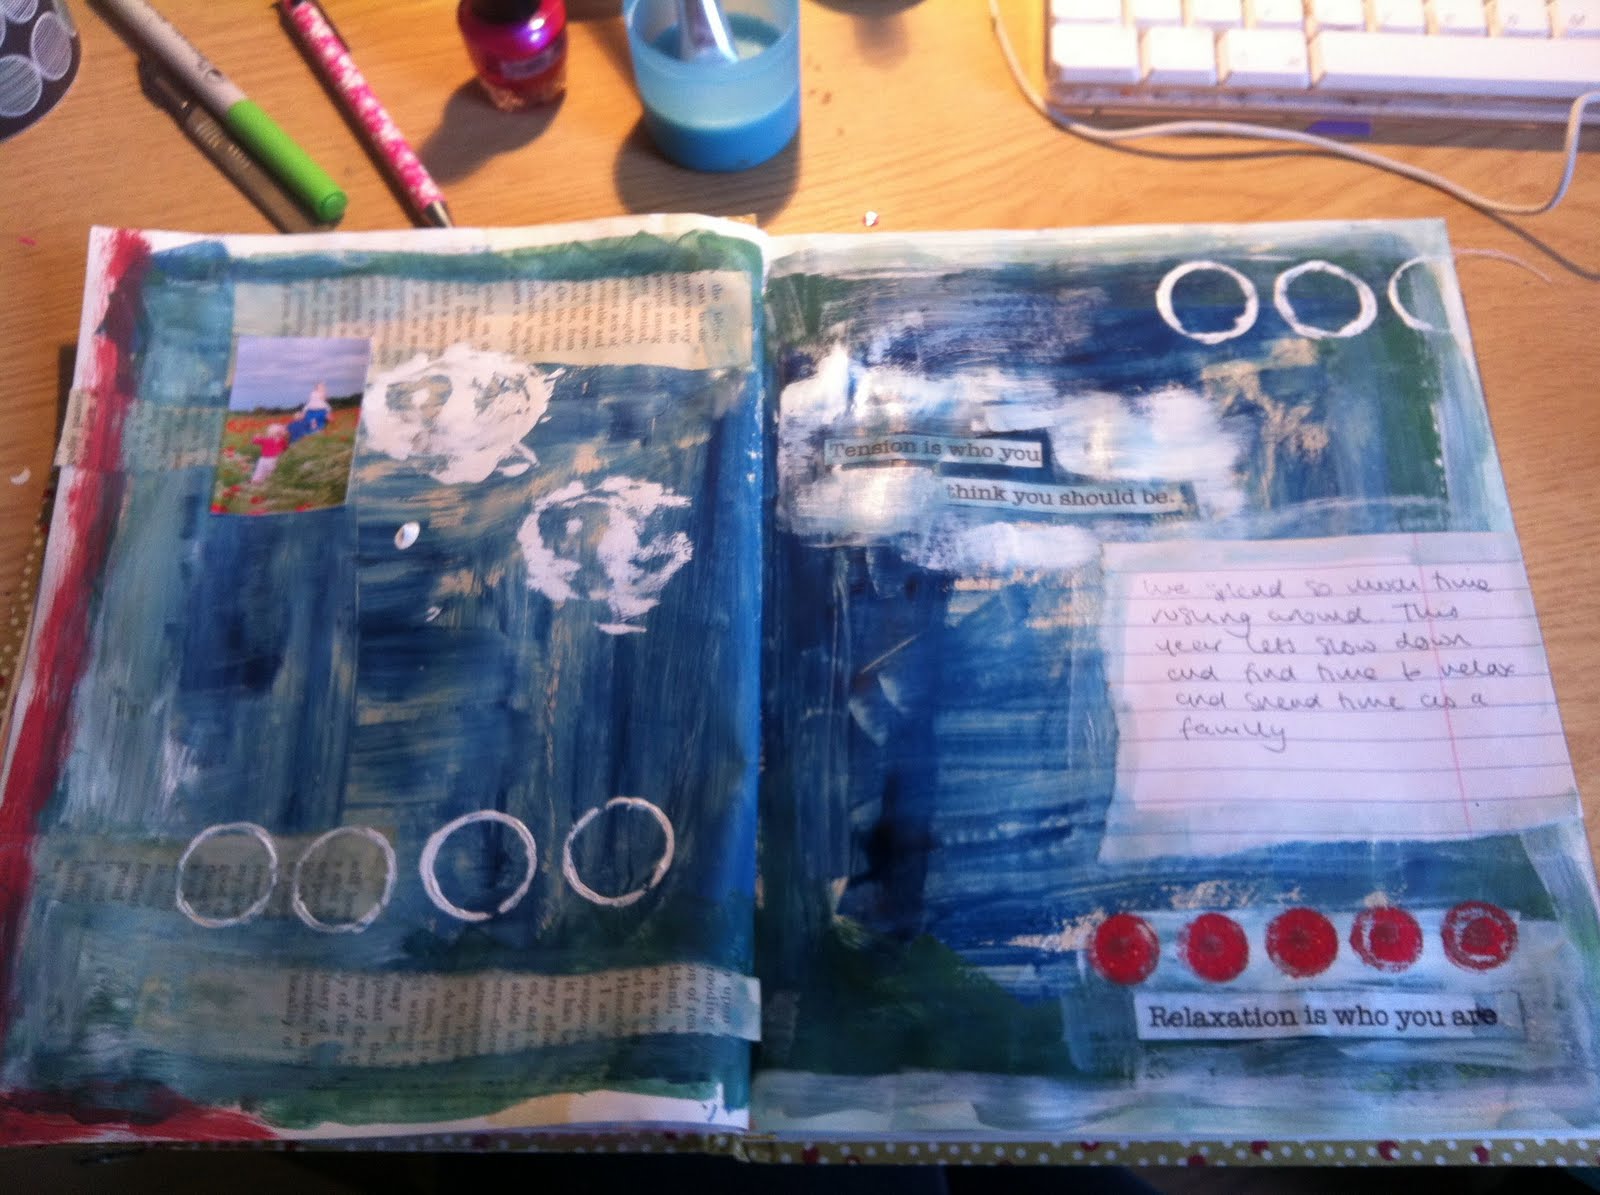
This Week's Word - Relax

We're still on our paint technique for this month, but todays word is 'relax', something that I for one need to do more often!

I have decided to use an old A4 diary to house all my pages for this project, so whether they be scrapbook or more art journal focussed they will all be together, which is fine.

I started off by covering my page with some acrylic paint (parchment)


Next I grabbed some watercolour paints and roughly painted over the base paint in blues.


then I added some greens


To add some interest and texture I ripped some strips from an old book and stuck them down, used a lid with white paint on to add some circles and used paint on a piece of card to squish some paint patches onto the page too. I just had fun and did what I felt like to add texture to the pages.


I found a quote I wanted to use, typed it up, printed it out and stuck it the right hand page and added some journalling on a piece of notepaper. I printed out a small photo of my family and stuck this in too. I used a Jenni Bowlin paint dabber in cough syrup around the left edge and made circles across the bottom. I added an Elles studio tab to the top too. To finish off I used some Maya mist in silver and rose pink.


To add the word relax I lightly stuck down some letter stickers and then roughly painted over with white paint, then peeled the stickers off again. My finished page is below:


Hope you like what I've done and that it gives you some inspiration for your own projects too. Please do link us up with your page or project when you've done it!

Annie x